Simple things, like keeping your helmet strapped to the outside of the pack, make it so you’re much more likely to put it on right when you arrive at the base of the cliff—often the most dangerous place you’ll be all day.
RELATED: Climb Harder As A Weekend Warrior
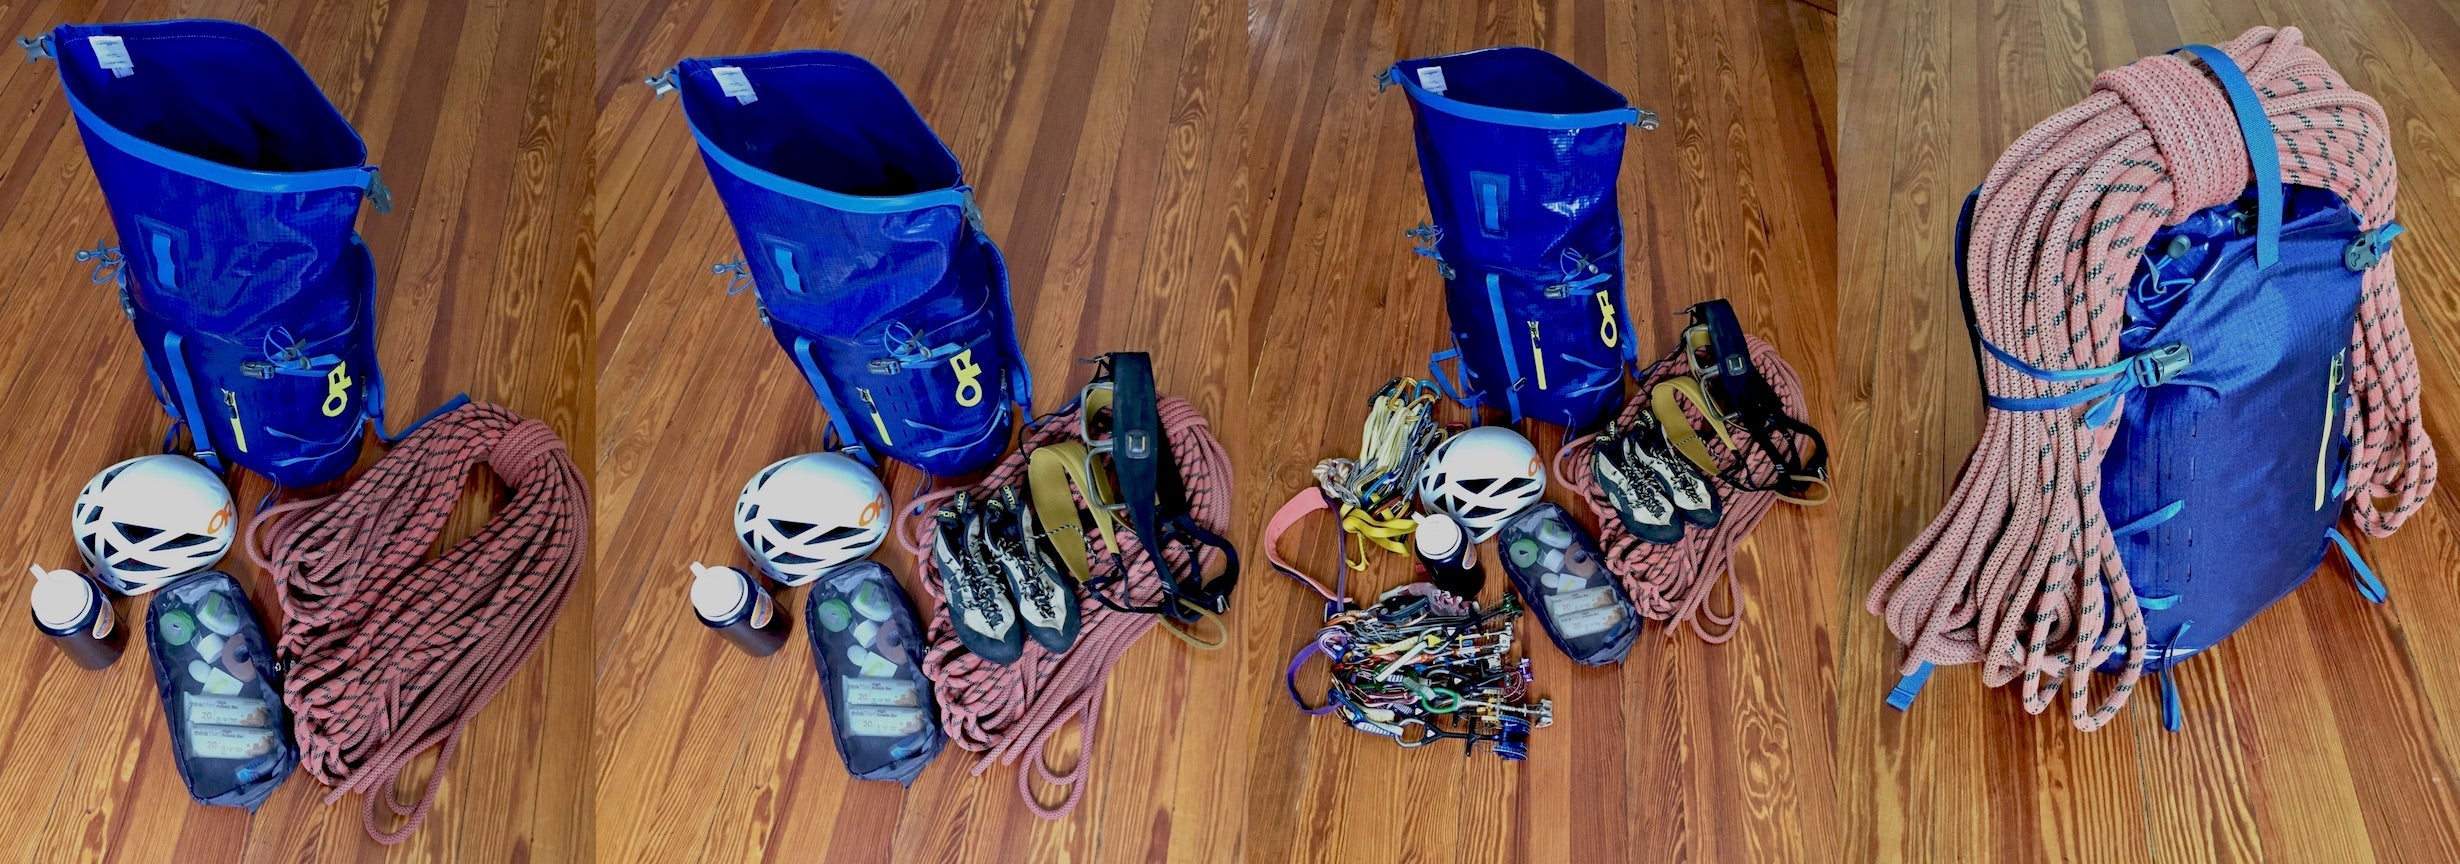
We all seem to be “tech-weenies” these days, and more than likely have several packs to choose from. Personally I like to use the smallest bag I can get away with, being cautious not to go too small. By sticking to this mantra I’m much less likely to bring too much stuff. For a single day of climbing, I like the Dry Payload 32. Remember: We’ll be home or in the pub later today!

There will likely be some regional differences that’ll dictate what you bring, so I’ll let you figure that one out yourself. But here on the east coast, the weather forecast is typically pretty accurate for the current 24 hours, so I’m not packing a down puffy in the summer months. But, I am packing some insulation and definitely a bug layer. Tor this, I’ve been using an Echo Hoody because it’s so light and I can cinch the hood around my head, creating an effective seal. Other than that, I’ve got a rope, helmet, harness, shoes, chalk, double rack of cams, a dozen draws/alpine draws, belay device, Ascendant Hoody, a liter of water, first-aid kit and wag bag, my lunch and a little personal kit. My personal kit includes a headlamp, tape, bars, super glue and a few other little odds and ends. Lots of new packs have no lid, which is nice if you’re climbing with your pack on, so a personal ditty bag of some sort helps keep the essentials accessible.
RELATED: The Summer Sending Kit
Now it’s time to actually pack. I like to start with whatever I don’t think I’m going to use all day, or at least until the end of the day: my insulation layer. Then I try to anticipate the order of importance of everything else. Hoping that my first aid kit will not be needed, it goes in next, followed by my lunch.
From here, I’m expecting to need the remaining items in descending order, and typically put my chalk bag under all the hardware. Since when you need the hardware, you need your harness and shoes, those go on top, the first things you’ll be putting on at the base of your route. And, like I said, helmets go great on the outside or right on top so you’re prompted to put it on ASAP. Last but not least, my keys, phone, wallet and summit snack bar go in the simple zippered front pocket. There’s nothing worse than having to dump out your whole pack to find the car key at the end of the day!

With a nice butterfly coil, the rope drapes neatly over the top of your pack once it’s on. This keeps it handy when there is an easy approach pitch or even just a steep(ish) slab at the base of the route and your partner is a tad less experienced than you. This also puts the heaviest single item on top, which is rule number one!
When it’s possible, divide shared items between the team for efficiency. If one person if faster or out in front, send them with the rope so they can have it stacked and ready to go when you arrive. Thoughtful packing enables quick starts, less fumbling and a more pleasant day out.
RELATED: Surprise! You Can Go Cragging Without A ...
Lastly, keep it all tight. If you have items on the outside of your pack, secure them. These packs have compression straps and daisy chains for a reason. Items swinging around on your back aren’t that big of a deal walking down Pearl Street in Boulder, but it’s not for rock-hopping the talus on your way up to Moby Grape on Cannon on Cannon Cliff.